
You can buy it too here.

The pattern calls for Worsted Weight Yarn and 4.5 mm crochet hook. I used Lily Sugar'n Cream (it's what I had on hand) for the yellow, and some scrap brown yarn that I also had on hand. 4.5 mm hook is a 7 here in the US... which wasn't in my hook case (where oh where did I put that hook?) So... I opted to use a smaller size, I used the G / 6 size hook.
The materials list of this pattern calls for a little bell to use for the rattle. I really did not like this option, so I came up with something else.
I have beads:

and I have bead containers:

So, I put the two together:

Then I wanted to be sure the two were sealed so I used packaging tape on both ends.
 |
| I already did one end and this is how I did the second end; I centered the container on the tape |
 |
| folded up one end of the tape |
 |
| wrapped the tape around the bead holder |
 |
| folded the other end of the tape up and wrapped the tape around |
 |
| Taped on both ends |
 |
| My rattle will easily fit in the body of the giraffe. (I'm also thinking, wow this is big! **Remember I used a smaller hook than what the pattern called for.) |
 |
| Here are all of the pieces after I made them. |
 |
| I found some quilt batting in my stash that I had left over It just happened to be just the right width. YES! |
 | ||
| I tried wrapping it in Saran Wrap so I could insert it into the giraffe body. That didn't work. So... I tried wrapping it in Waxed Paper. That didn't work either... So... hmmm... |
 | |
| I opted to try sewing one end of the rolled batting. I left the thread tails long just in case it would work and then I could pull the thread out. IT WORKED!! It even worked to pull the thread out! YES! |
 |
| Oh... guess I should say I did stuff the ball end of the body a bit before I inserted the rattle. |
 |
| I sewed the spot onto the back of the head and sewed on the horns. Next is the ears! |
 |
| I sewed on the nose and the mouth... again... pre-stuffing and pre-sewing the snout onto the head |
 |
| The snout is sewn on and the eyes have been embroidered. |
 |
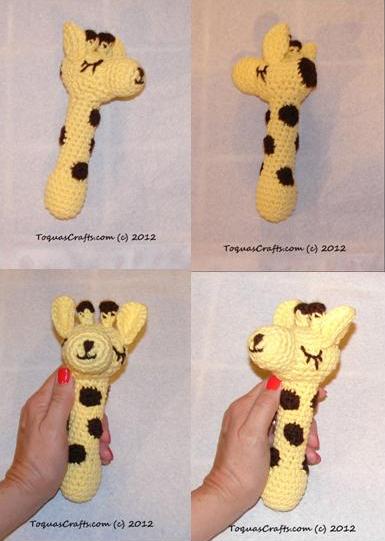
| Isn't that face just adorable? |
 | |
| Really? Who could resist? Now that the embroidery is done, all the eyelashes are on, and the snout is on, I stuff the head and sew it to the body. |

 |
| This rattle ended up being about 8 inches tall |
 |
| The body is about 1 1/2 inches thick |
Would I make this pattern again knowing how big it is?
DEFINITELY !
I would like to try it with perhaps baby yarn and yet a smaller hook.
It is still super cute!
Linked up with:
Made By You Monday
Toastie Studio Blog: Create & Inspire
I Gotta Try That
Inspire Me Monday
Pin It Now!
This little giraffe is so cute. I should try and make one but it looks a little difficult for me. Either that or I am lazy. :) Thanks so much for sharing it on "I Gotta Try That Monday" linky party. Have a great day!
ReplyDeleteMarcie